DE | EN

Introduction

In this guide you will learn how to migrate your Linux and Windows VMs from Hyper-V to Proxmox VE.

For this migration you'll need to turn off your VMs.

Preparing Hyper-V

Inside Hyper-V we want to create a new network share, so we can mount it directly to our Proxmox VE server.

First log-in to your Hyper-V server as Administrator and locate your Virtual Disks folder.

Explorer

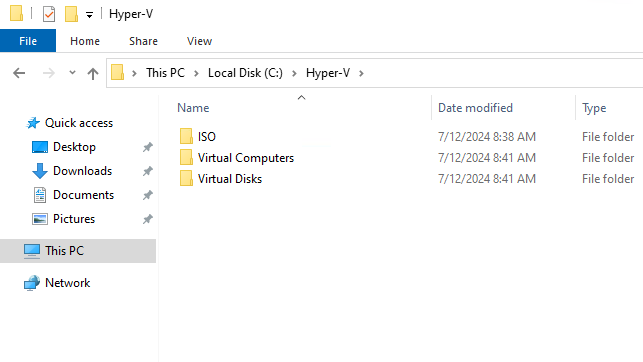
Then right click your Virtual Disks folder, and hit Properties.

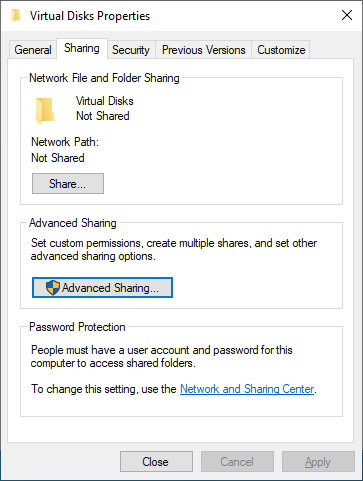
Switch to the Sharing tab:

Now click on Advanced Sharing:

Sharing
Advanced Sharing

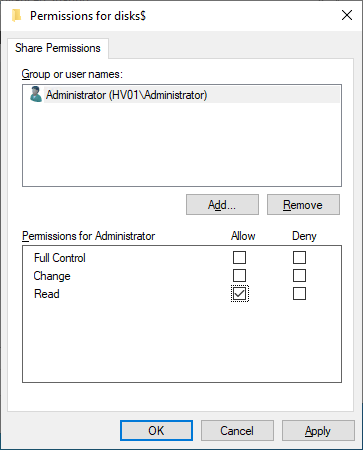
By default it will look this, remove the everyone permission, and add one for your Administrator like this:

Advanced Sharing New

Click OK until you've confirmed all windows related to the folder.

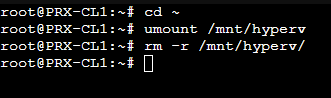
We can now move over to the Proxmox Server.

Mounting SMB

On our Proxmox Server we click on our Node and then Console.

In our console we issue following commands:

Info: Replace the IP address to match the one of your Hyper-V server. If you used another Administrator user, then adjust the commands as well. You will be prompted for the password as well, while typing it, it won't be visible, so just type it blindly and press enter.

mkdir /tmp/hyperv

mount -t cifs -o username=Administrator //10.0.20.5/disks$ /mnt/hyperv

Mount

Awesome, we can use ls /mnt/hyperv to see the contents of our folder. If we see our vhdx, everything's good.

Qemu Guest Agent

Here's a wiki entry by Proxmox: https://pve.proxmox.com/wiki/Qemu-guest-agent

That page links to https://pve.proxmox.com/wiki/Windows_VirtIO_Drivers

And that page finally links to: https://fedorapeople.org/groups/virt/virtio-win/direct-downloads/archive-virtio/?C=M;O=D, which is where you can obtain the ISO file.

Here's some handy links from that page:

Once you have the ISO-file, move it to your Hyper-V Server and attach it to your VM.

Within the VM, we run/install following as Administrator:

  • virtio-win-gt-x64.msi
  • virtio-win-guest-tools.exe
Install Guest Agent

After you've installed the drivers and agent, shutdown your VM.

Recreating the VM

We need to recreate the VM within Proxmox without a disk, since we will add the disk later on.

In Proxmox click Create VM on the top right.

Start by taking note of the ID, as we will use that later.

Then name it the same as on your Hyper-V.

New 1

Click Next.

Then click Do not use any media and select the correct Guest OS type.

New 2

Change the BIOS to OVMF, select the storages, check Qemu Agent, and continue.

Info: If your VMs are Generation 1, keep the BIOS as SeaBIOS, for Generation 2 use OVMF.

New 3

Remove all disks, so the new VM has none.

New 4

Assign resources as required:

New 5
New 6

Adjust if needed and continue.

New 7

Review your configuration, if everything looks good click Finish.

New 8

Importing the disk

Head back to the Proxmox Console and use following commands to navigate to the disks folder, and import the disk to our VM. Adjust 100 and local-zfs to your Proxmox VE configuration if it's different.

The import will take a while, so sit back or grab a coffee ☕.

Import Start

When it's done it'll look like this:

Import End

Now head back to your VM and click Hardware.

Since Windows has never booted from VirtIO SCSI before, we need to boot from an IDE drive first, while a 2nd temporary drive is attached over SCSI.

If you don't do this, you'll get a bluescreen.

Double click Unused Disk 0, which is our boot disk and add it as IDE.

Unused Disk

Make sure it's set to IDE and click Add:

Unused Disk

Then create a new disk with 1 GB and change the Bus/Device to SCSI, then hit Add:

Unused Disk

Click on Options, you will need to adjust the boot order:

Options Boot Order
Options Boot Order

First boot

Now start up your VM and when you're on your Desktop, shutdown the VM again.

Desktop

Head back to Hardware, and detach the 1 gb scsi disk, then delete it.

Detach scsi0
Delete scsi0

Now detach the ide0 disk and reattach it as a SCSI device:

Detach ide0
Attach scsi0

Now head back to Options and change the boot order:

Final boot order

Start up the VM again, if everything works, configure your IP address.

Cleanup

When done, and no more VMs should be migrated, you should clean up.

Start by going to the Proxmox Console and typing following commands:

cd ~

umount /mnt/hyperv

rm -r /mnt/hyperv

Cleanup

🎉 Congratulations you have migrated a Windows VM from Hyper-V to Proxmox VE.

Linux

Follow the same steps as for Windows, except the qemu guest agent ones.

You can use SCSI on linux without having to use IDE first, so skip these steps too.

Once you're inside linux, adjust network configuration files to match the new network interface.

On Ubuntu you'd find the file in /etc/netplan/.

You can apply changes to that file with sudo netplan apply.

Afterwards you can install the qemu guest agent like this:

Info: Make sure Qemu Guest Agent is enabled within Options of your VM.

sudo apt-get update; sudo apt-get install qemu-guest-agent -y

Qemu Guest Agent

🎉 Congratulations you have migrated a Linux VM from Hyper-V to Proxmox VE.