Introduction
The aim of this guide is to migrate Windows and Linux hosts from an ESXi server to Proxmox VE.
There's many ways to do it, however we will explore one of the easier options.
Make sure both the ESXi Server and Proxmox are in the same network, for this migration to work you need to shutdown the virtual machines.
Adding ESXi as storage
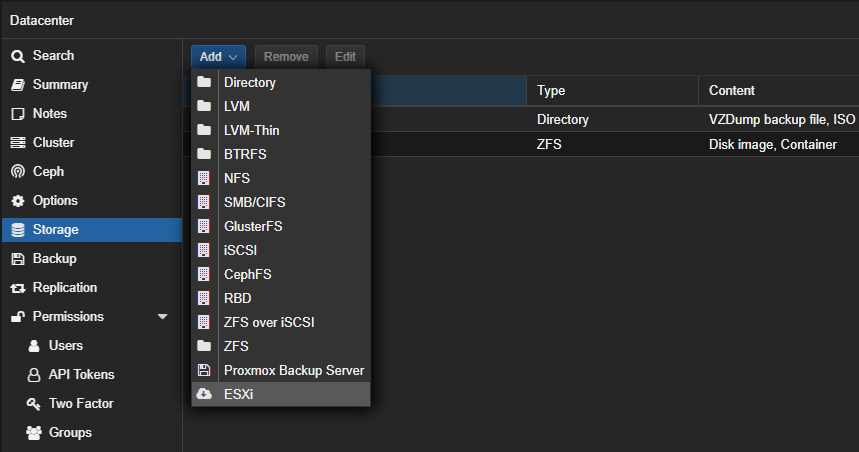
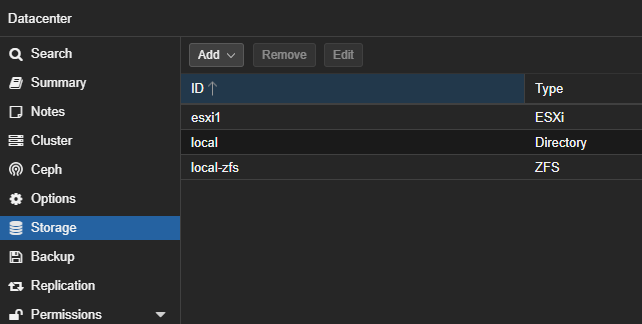
Before we can do any migrating, connect to your Proxmox VE server, click Datacenter and navigate to Storage, then hit Add and select ESXi:
You'll be prompted with a window like this:
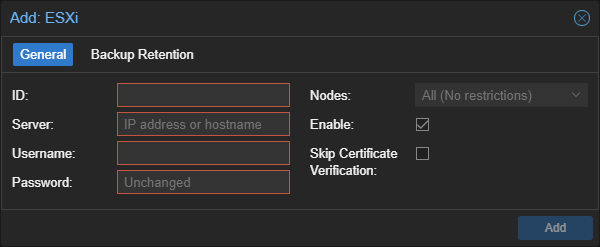
Fill it out, here's some information about the fields:
| Field | Info |
|---|---|
| ID | This is the id name of your storage entry, you could name it after the ESXi server. |
| Server | Enter the IP of the server, make sure it is reachable over the network. |
| Username | The username you use to connect to the ESXi server, by default: "root". |
| Password | The password you use to connect to the ESXi server. |
| Skip Certificate Verification | In most cases this needs to be checked, by default ESXi comes with a self signed certificate. |
Adding the storage entry
When done, it should look something like this:
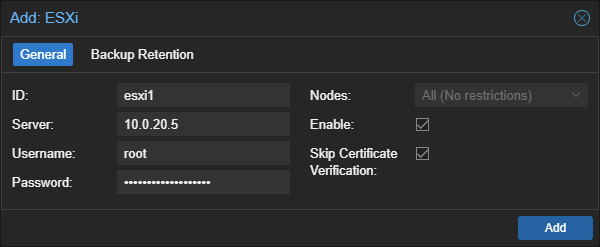
Then add it by clicking Add.
You will also have a new entry in Storage:
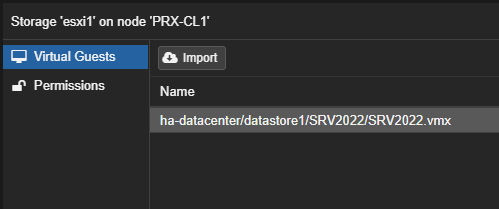
You can now use the sidebar to navigate to your node, and click your newly added storage.
This will show you all VMs on your ESXi server.
When you click an entry, the Import button becomes available.
Before importing you should prepare your VMs, the next steps in this guide will be about that.
Windows
This should cover Windows Server as well as Windows Client VMs.
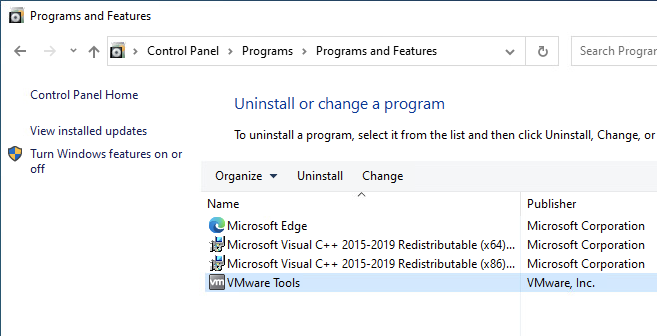
Uninstall VMware tools
You could do this later, but it doesn't hurt to do it now.
It can be uninstalled like any other Windows program:
Warning: This may fail on some older VMware tools versions.
If nothing happens when clicking Uninstall, you could try to mount the VMware tools ISO, and run the setup64 file with "/c" from a command line.
Qemu Guest Agent
Here's a wiki entry by Proxmox: https://pve.proxmox.com/wiki/Qemu-guest-agent
That page links to https://pve.proxmox.com/wiki/Windows_VirtIO_Drivers.
And that page finally links to: https://fedorapeople.org/groups/virt/virtio-win/direct-downloads/archive-virtio/?C=M;O=D, which is where you can obtain the ISO file.
Here's some handy links from that page:
- Latest stable: https://fedorapeople.org/groups/virt/virtio-win/direct-downloads/stable-virtio/virtio-win.iso
- Most recent: https://fedorapeople.org/groups/virt/virtio-win/direct-downloads/latest-virtio/virtio-win.iso
Once you have the ISO file, upload it to your ESXi Datastore.
Then attach the ISO file to your VM.
Navigate to the files from explorer, and run/install following as Administrator:
- virtio-win-gt-x64.msi
- virtio-win-guest-tools.exe
Starting the import
Remove the ISO from the VM, take note of the IP configuration if you haven't already, then shutdown the VM and head over to Proxmox.
Navigate from the left side to your ESXi storage, select your VM and hit Import.
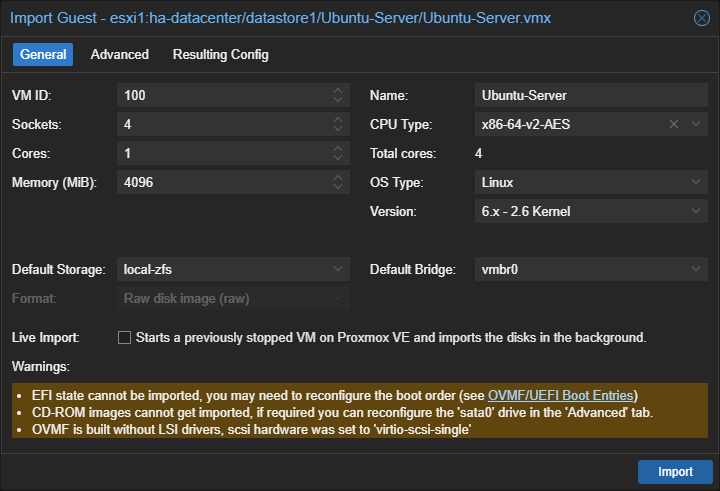
You'll see a window like this:
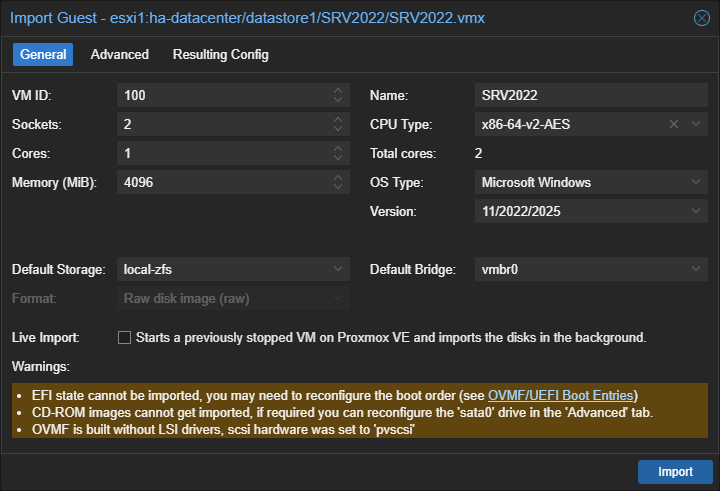
You can change some resources here if you need to.
The live import checkbox may sound like live migration, but it's not. This checkbox will start the VM during the migration as soon as it can, while it still migrates. I suggest to leave that off if you're unsure.
Click Advanced and make sure the SCSI controller is set to VirtIO SCSI single.
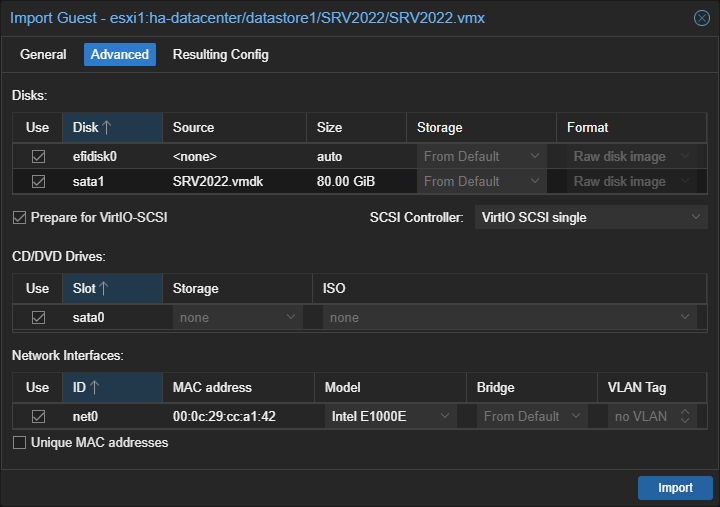
You can change the network model to VirtIO, you'll have to reconfigure your IP configuration later, keep that in mind.
Hit Import to start the import.
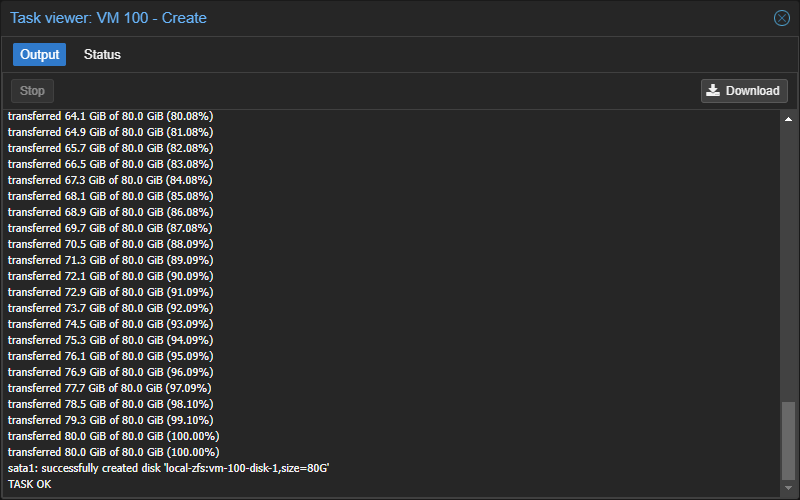
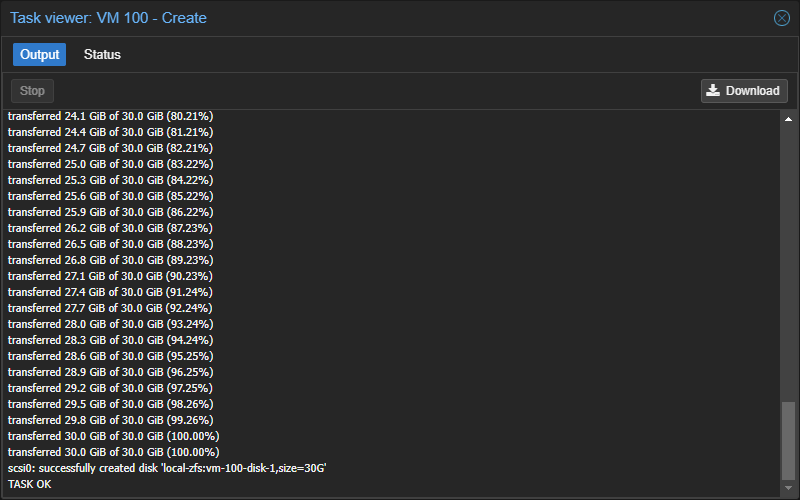
You may need to scroll down when it's finished to find TASK OK, you can close the task viewer now.
Finalizing import
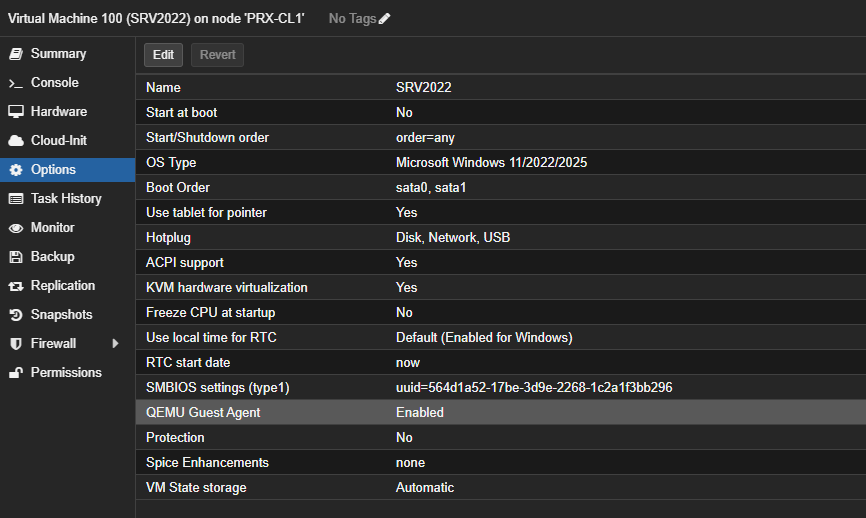
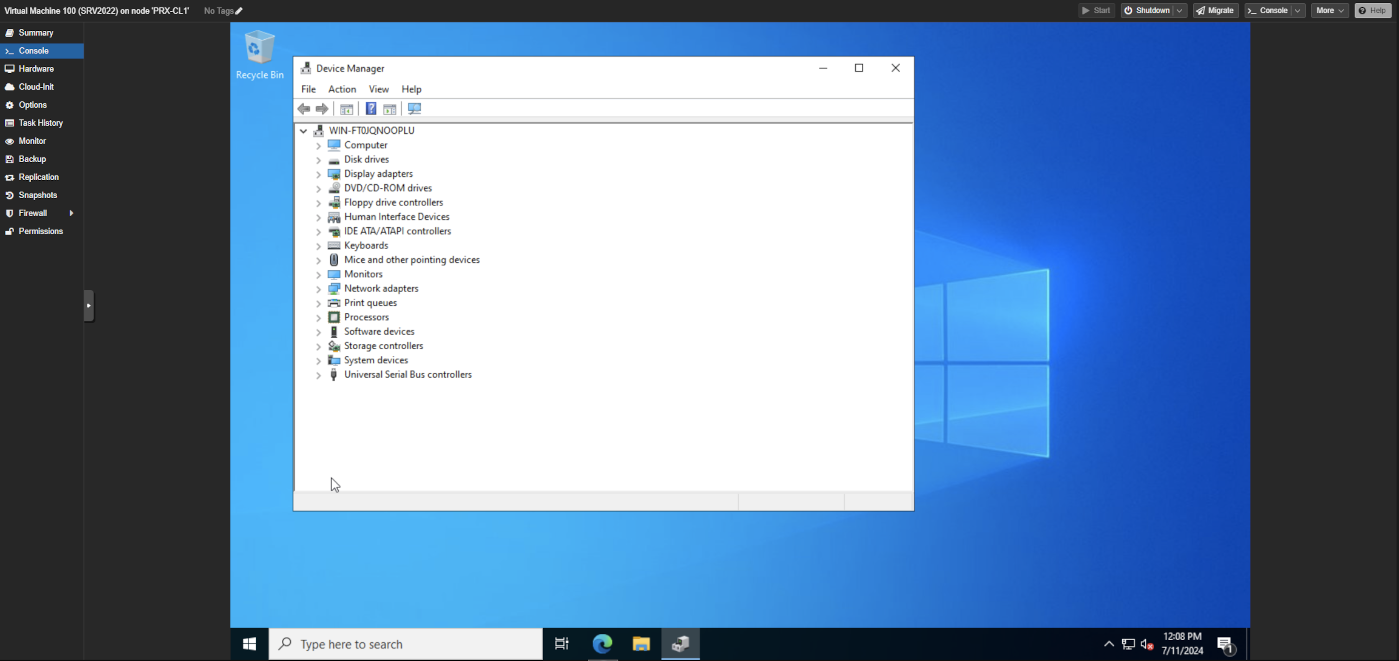
Navigate to the Options of your VM, and enable QEMU Guest Agent.
Start the VM and check if everything works as expected.
Set the IP configuration from within Windows by clicking Console.
Congratulations, you have migrated a VM from ESXi.
Linux
Before you migrate a linux VM, make sure you know how to change the IP configuration to a different network interface.
It will most likely change after the migration.
On Ubuntu you'd find this configuration file here: /etc/netplan/
After changing this file, you can apply the configuration by running: sudo netplan apply
You'd figure out which the new interface name is by running: ip link
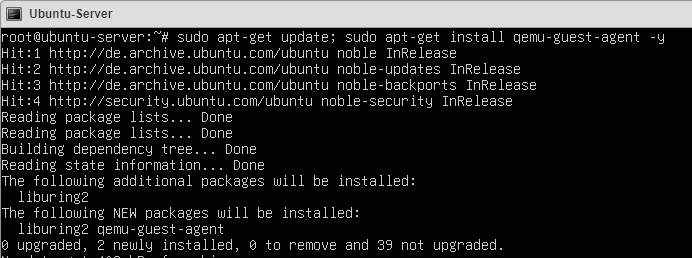
Now install the qemu guest agent package, this differs for every distribution. On debian based systems you can do it like this:
sudo apt-get update; sudo apt-get install qemu-guest-agent -y
Take note of your IP configuration if you haven't already, then shutdown your VM, then navigate to the side navigation of your Proxmox and select your ESXi Storage.
Select your VM and hit Import:
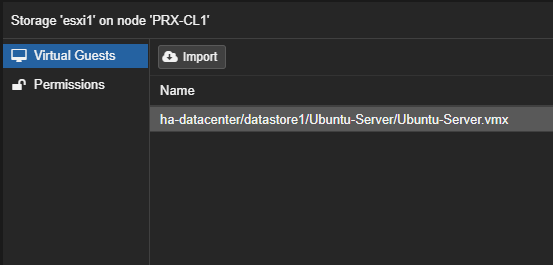
You'll get a window like this:
You can change some resources here if you need to.
The live import checkbox may sound like live migration, but it's not. This checkbox will start the VM during the migration as soon as it can, while it still migrates. I suggest to leave that off if you're unsure.
Click Advanced and make sure the SCSI controller is set to VirtIO SCSI single.
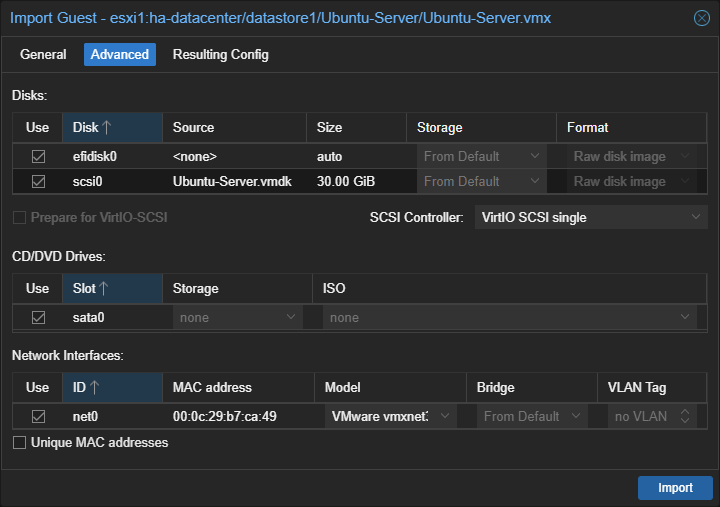
You can change the network model to VirtIO, you'll have to reconfigure your IP configuration later, keep that in mind.
Hit Import to start the import.
You may need to scroll down when it's finished to find TASK OK, you can close the task viewer now.
Navigate to the Options of your VM, and enable QEMU Guest Agent.

Start the VM and check the network interfaces, adjust network configuration files if necessary.
🎉 Congratulations, you have migrated a Linux VM from ESXi to Proxmox VE.